Friday 28 February 2014

Applying the finish

Just before I start applying the finish I need to stain the headstock and get the lettering on it.


Didn't see the point in trying to get a burst effect on the headstock so I went with the same ink mix that I used on the outer edge of the body.

I used shellac on my last kit with stunning effect so I thought I would use it again on this one.  I know it's not as hard wearing, and it's a labour of love to apply however it feels just delightfully silky soft and warm to touch.


 The shellac darkened the basswood body giving it a warm antique look


 And the same for the maple neck, but the front is a different story...

In my inexperience I didn't count on the natural slightly yellowy colour of shellac and what it would do to my lovely blue front and headstock!


Oh look, the lovely flame top blue burst has turned a greeny blue...  Oops...  Thankfully and with no shortage of luck it's turned a gorgeous dark sea green and blue.  This certainly wasn't planned but I absolutely love the results, in fact I'm almost sorry that it's going to someone else now!


Thankfully the headstock turned out the same colour, and although the black initials in the hearts can only just be seen, the gold lettering stands out rather quite nicely

Tuesday 25 February 2014

Setting the neck up ready for gluing

When I opened the kit I noticed the neck had a bit of back bow when it arrived.  I tweaked the truss rod about half a turn and it straightened out perfectly.


Using a straight edge resting on identically size blocks of aluminium I was able to see the necks back bow.


 Some tweaks of the truss rod, about half a turn in all...


And it was soon dead straight.  I then left it a week to see if it would move anymore, it didn't so I was able to get on with leveling the frets with an oil stone.


 After leveling I re-crowned the frets with some needle files.


I then cut the headstock shape out.  This series of love hearts, one for each member of the family was designed by the girls.  Each heart will have their initial in it

Tuesday 18 February 2014

Adding some colour

Okay after carefully sanding back the deep black to more of stripey grey it's time to add some colour.  It was decided that it should be blue so here we go.  Unfortunately the kids weren't able to be here and I'm limited to time so I've cracked on with it.


 First layer of watered down cobalt blue ink.


 Building up the colour using neat ink...


 Added a tiny bit, and I mean a tiny drop, of black ink to darken it around the edges.


Let's see how it looks with the fittings - This is going to look good!


Sunday 16 February 2014

Making flames...

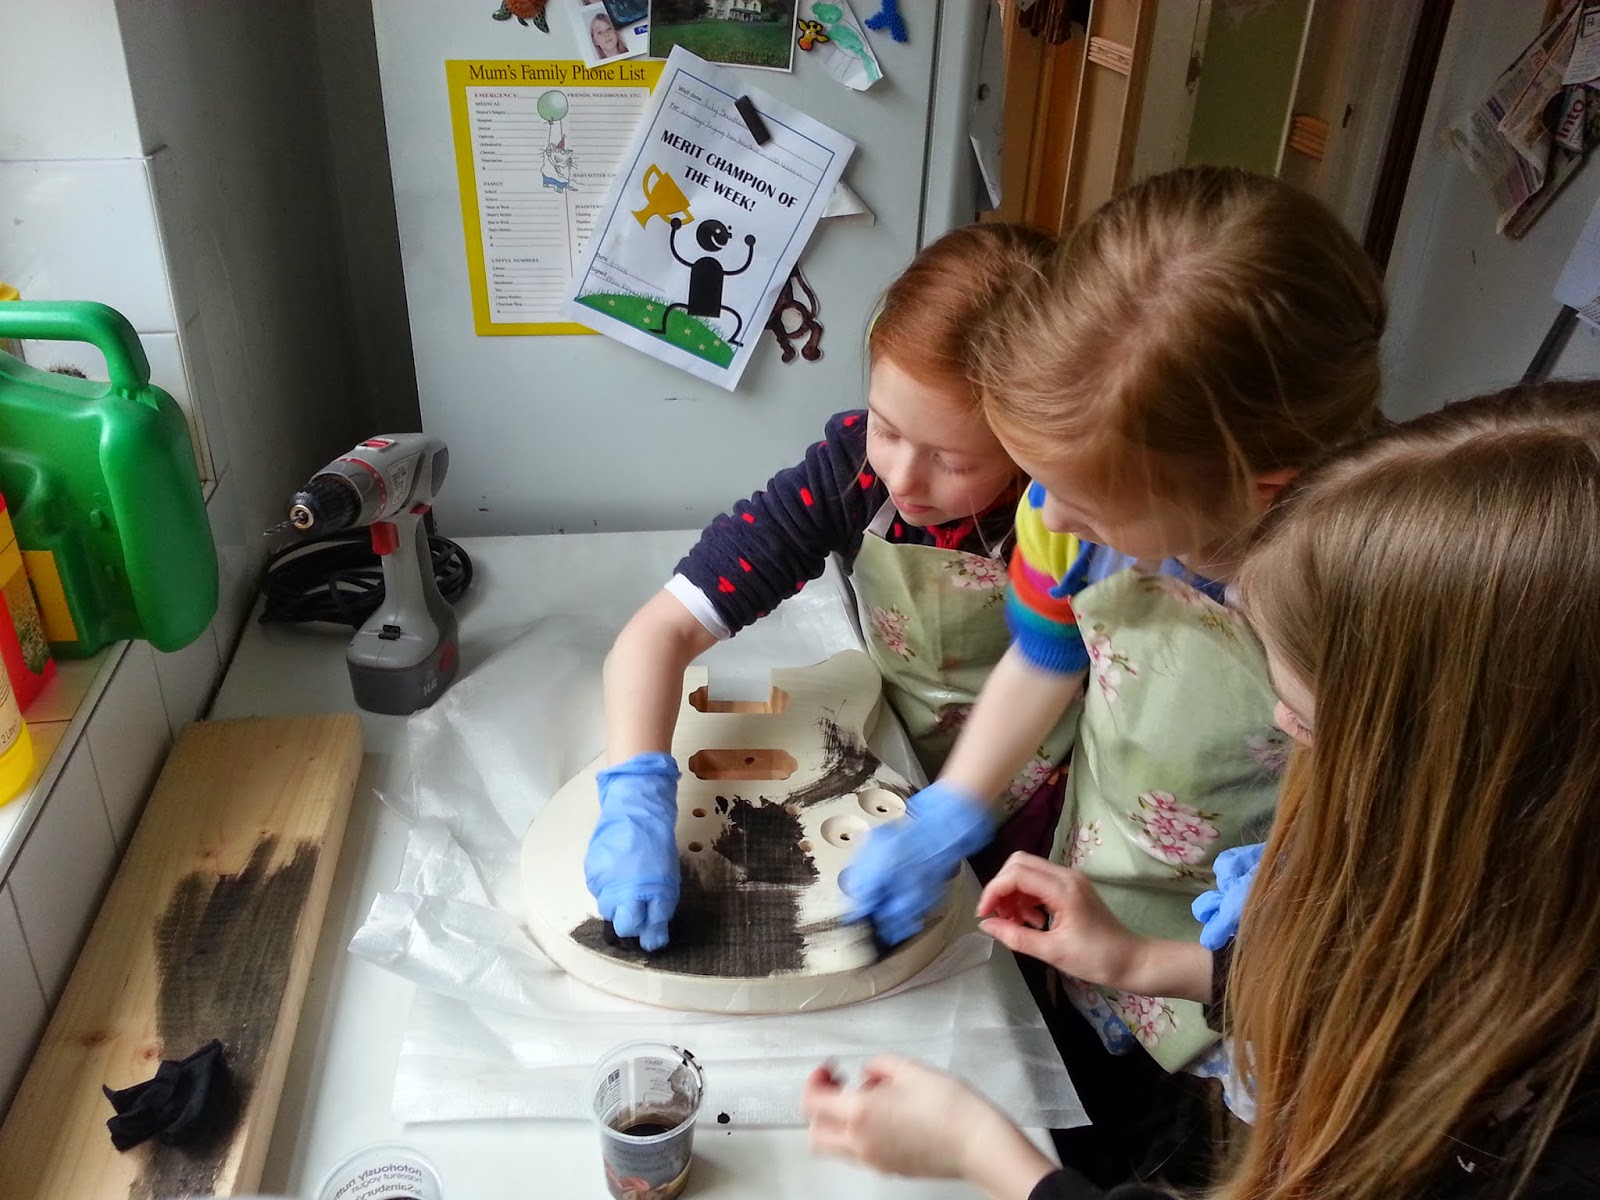
As this is a birthday present, I intend to print this blog and include it with the guitar.  This means I need his kids to help...

First thing we did was liberally cover it in black ink, which will be sanded back bring out the flame stripes.


Aprons donned and black ink poured, now the messy stuff ensued...


 Lily, now being an expert after the last project supervised


Nearly there...


A few hours later and it had dried, the girls didn't like sanding - apparently it's boring so they left that to me.  As with the Les Paul kit you have to be careful sanding as it's only a very thin veneer and can easily be sanded through so I did it all by hand with a fine grade sandpaper.

Saturday 15 February 2014

Kit build number 2 - Getting started...

Hi thanks for visiting my blog.  After completing a kit build Les Paul with my daughter a friend of ours asked if I could build a kit as surprise for her husband so this is the story of the 'Andy's Special'.

To start we had to decide which kit to go for, after some thought my friend opted for this one, a solid body with dual cut away and fixed neck.  This particular one, the TCPC-60, was bought from Amazon for about £140 and as standard it didn't come with any assembly instructions.

It has a carved basswood body with a flame maple veneer on top.  As you can see the neck socket, pick up cavities come pre-routed however I'll need to work out the positioning for the tune-o-matic bridge and string anchor posts.  The neck is maple with rosewood fingerboard and the electrics are cheap and cheerful as you would expect from a kit that cost less than £150.  The vol/tone components came pre-wired and had lots of crappy dry joints so I stripped it apart.  I also replaced the 0.047uF green hornet capacitors with some 0.022uF polypro capacitors.  I've used these before and they sound much than better with PAF style humbuckers.

Anyway best get started...


The first thing I did was mark out the neck position so that everything will line up properly when the neck gets glued in later on.


When I marked the neck position I noticed that there was no wire hole through to the pick up switch cavity, two minutes with a drill soon fixed that!


I then put masking tape down and drew lines matching the neck taper.  Then I measured from the nut to the 12th fret and doubled this to work out where the bridge needs to go.  Then moved the bass side back 3 degrees as per the Gibson bridge positions specs to allow for intonation adjustments.  The anchor was also positioned behind the bridge as per the Gibson specs.


So this is how it should all look, next job is to get the post holes drilled and then we can add some colour.